Adding Advanced Email Validation to Auth0
Auth0 is a great service to use as an authentication system for your SaaS business. Their universal login looks great out of the box and provides the right customization features.
To guide your users even more during the user registration or sign up process, I usually want to provide immediate feedback regarding invalid or malicious email addresses.
New potential customers get a hint about a potential typo if the email address is invalid (e.g. mailbox or domain doesn't exist). This avoids confusion afterwards: Where is the confirmation email you promised?
It also protects your service from getting malicious sign-ups using known spammer domains or email addresses from disposable email services. Additionally, email addresses detected as spam traps are something you don't want to have on your list.
In this article, we guide you through the process to connect the Email Validation Service CampaignKit with Auth0 to add email validation to your universal sign up page.
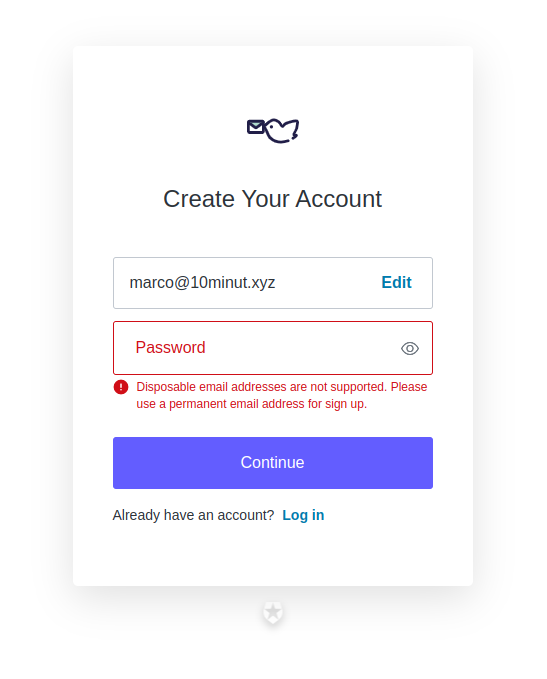
Auth0 Universal Login with email validation
Creating a Custom Action
Navigate to your Auth0 Dashboard and click on the Actions menu on the left side to expand it. Inside the Actions menu, you find the item Library. Open it and click the Build custom button to create a new custom action.
A modal window will open. Give your custom action a name.
As the trigger, select Pre User Registration to make sure our action will be invoked before the actual user registration.
We are going to use Node to implement our action. Select Node 16 (Recommended) as your runtime (if it's not already pre-selected)
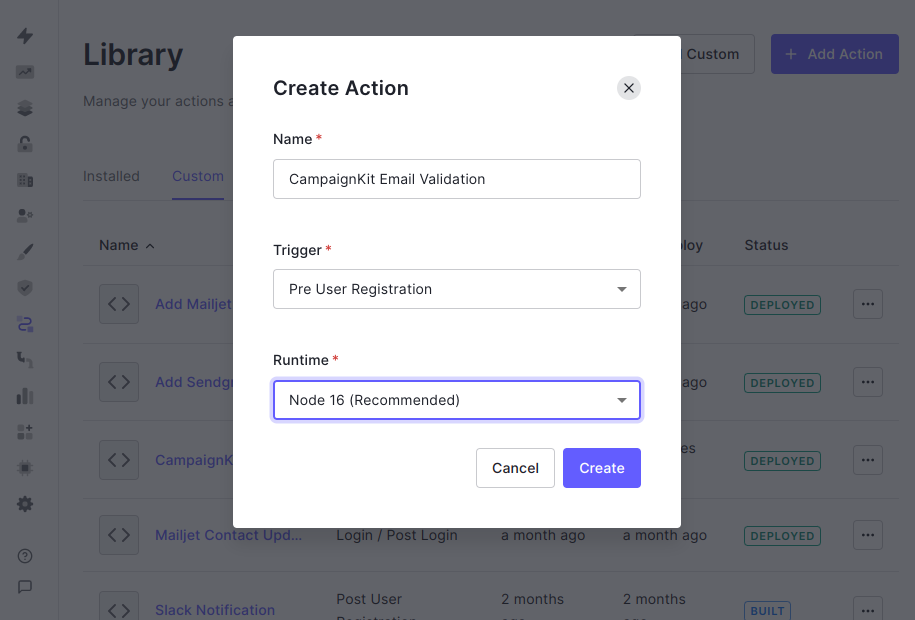
Creating a new custom action
Click the Create button to create the custom action.
Implementing the custom action
After creating the custom action, the editor is shown. It assigns an empty function to the onExecutePreUserRegistration hook_._
Auth0 calls this function when a user submits the registration form and before the actual user is created.
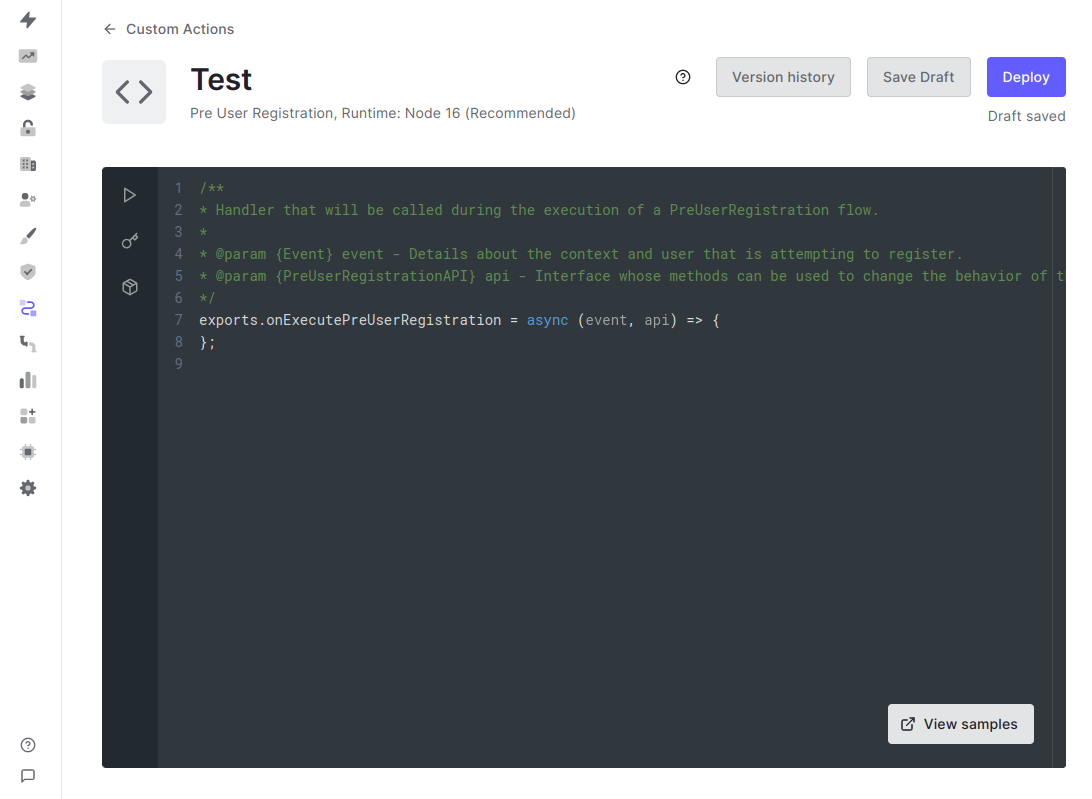
Custom Action Editor
The following code is the complete implementation to validate email addresses before a user is created. It rejects user registrations with invalid or malicious email addresses and shows a custom error message.
Copy & Paste the following code from our GitHub repository into the editor and click Save Draft:
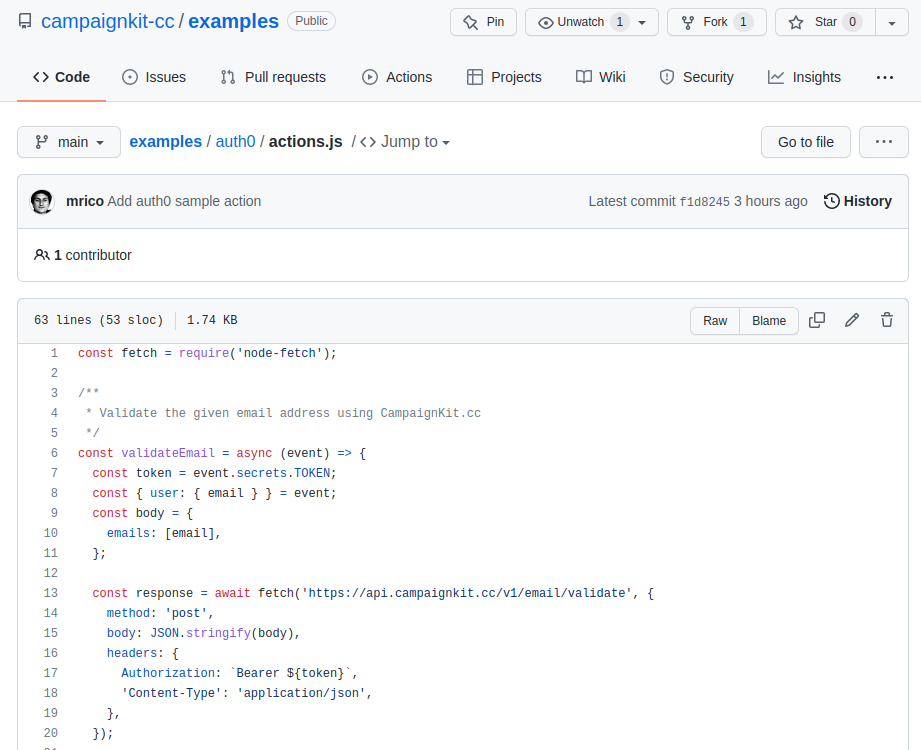
https://github.com/campaignkit-cc/examples/blob/main/auth0/actions.js
To learn more about the CampaignKit Email Validation API, go to our article Getting Started with the Email Validation API to learn more.
Configuring Dependencies
Our implementation uses the node-fetch library to call the CampaignKit Email Validation API via HTTPS requests.
This dependency needs to be declared. Click on the box symbol on the left and click Add Dependency.
Enter node-fetch as the name.
As the version use 2.6.6 instead of the latest! Version 3 is only available as an ESM module and cannot be loaded via require. This is why we have to stick to version 2 here.
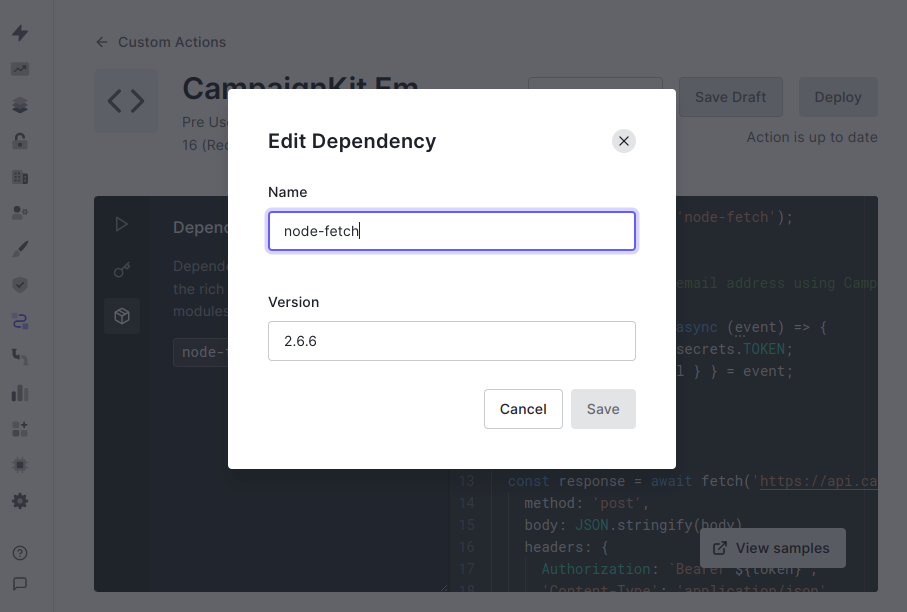
Click the Save button to add the dependency.
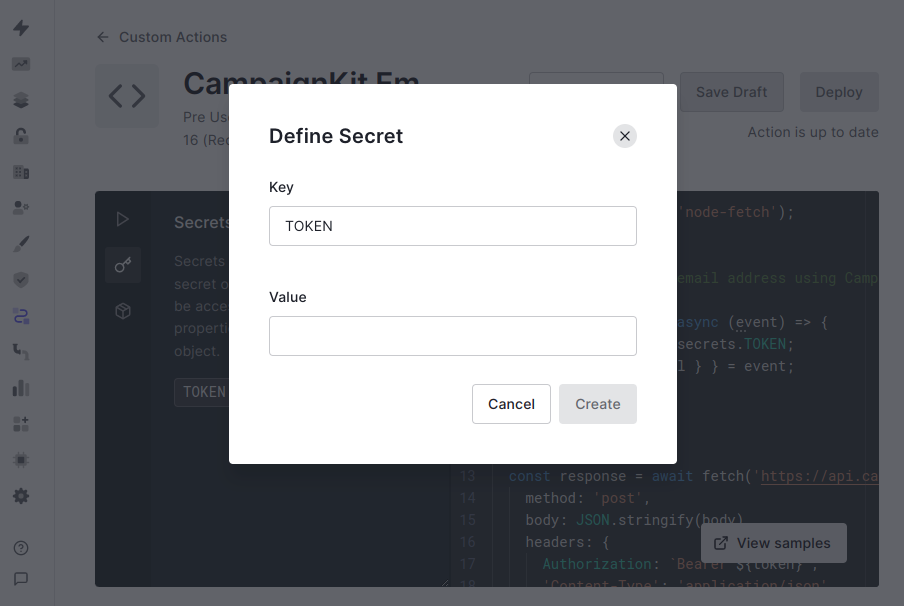
Defining the Secrets 🔑
Before we can use our new custom action, we need to define the API token to access the CampaignKit API.
To get your API token, you need to create an account for CampaignKit.
In your custom action, click on the key symbol. Click Add Secret to add a new secret for your custom action.
As the key use the value TOKEN. Copy & Paste your API token as the value.
Click the Create button to create the secret.
Click the Deploy button to publish your new custom action. It will only be available for your account.
Your new custom action is now ready to use. Let's continue to the last step and add it to the workflow.
Adding the Custom Action to your Pre User Registration Workflow
Now it's time to add your email validation to your user registration.
Navigate to Actions->Flow using the left menu. Click on the Pre User Registration item to open the workflow editor.
On the right side, click on the Custom tab. You should see your newly created action.
Drag & Drop your custom action to the workflow editor as shown below.
Click the Apply button to put your changes live! 🥳
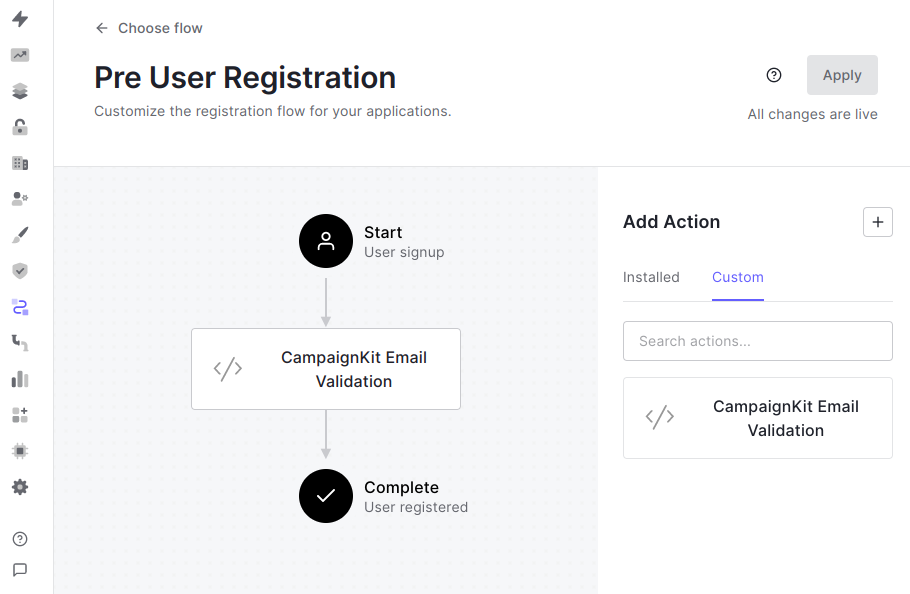
Add CampaignKit Email Validation Action to the Pre User Registration Flow
Testing your registration form 🧪
To test your integration, navigate to your signup page. To see all validations in action, you can test with the following email addresses:
- ❌ Use an email address from a disposable email service like 10minut.xyz.
- ❌ Use an email address with a non-existing domain.
- ❌ Use an email address that doesn't exist (e.g. sdapofkaspodfposdkf@gmail.com)
- ✔️ Use a valid email address
In case something goes wrong, navigate to Monitoring -> Logs to find more details about the issue.
Conclusion
A great onboarding experience starts with the registration page. Helping your users to detect typos in their email addresses saves them from weird issues and additional work to recover later.
As a SaaS owner/operator, you want to reject malicious user registration instantly. Validating the email addresses against common blacklists is a great approach.
If you want to learn more about how email validation works, read our article Email Verifier - Validate and Clean Email Addresses.
Join 1,000+ CompaniesImproving Email Deliverability
Start with 200 free validations. Upgrade only when you're ready.
No credit card required • Cancel anytime